
Why Interior Painting Preparation Matters
Good interior painting preparation creates a clean, accessible surface for the new paint and gives the painting crew enough room to work safely and efficiently. Paint may look simple, but imperfections underneath it can remain visible after the new coat is applied. Dust, grease, loose paint, nail holes, cracks, and damaged drywall can all affect the final appearance. If these issues are ignored, a fresh color may draw more attention to them rather than hide them. Preparing the room also protects your belongings. Furniture, flooring, artwork, electronics, and other household items can be vulnerable to dust, paint splatter, and accidental contact during a project. The goal is not to do the painter's job. Your role is mainly to make the space accessible, remove personal belongings, and identify anything that needs special attention. Professional painters can then handle the technical preparation required for the surfaces.How to Prepare for Interior Painting
The best way to prepare your house for interior painting is to work through the rooms before the painting crew arrives. Start with the items you can safely handle yourself, then leave repairs and surface preparation that require professional judgment to the painting contractor.Start by Removing Personal Items
Begin by taking small and valuable items out of the room. Decorative objects, photographs, artwork, plants, lamps, and other loose belongings should be removed rather than left on shelves or furniture. Wall decorations should also be taken down before painting begins. This gives the painters clear access to the walls and prevents frames, hooks, and other objects from interfering with the work. Keep the removed items in another room or a secure storage area where they will not get in the way. If something is difficult to remove or you are unsure whether it should be taken down, mention it to the painting crew before work starts.Move Furniture Before Painting
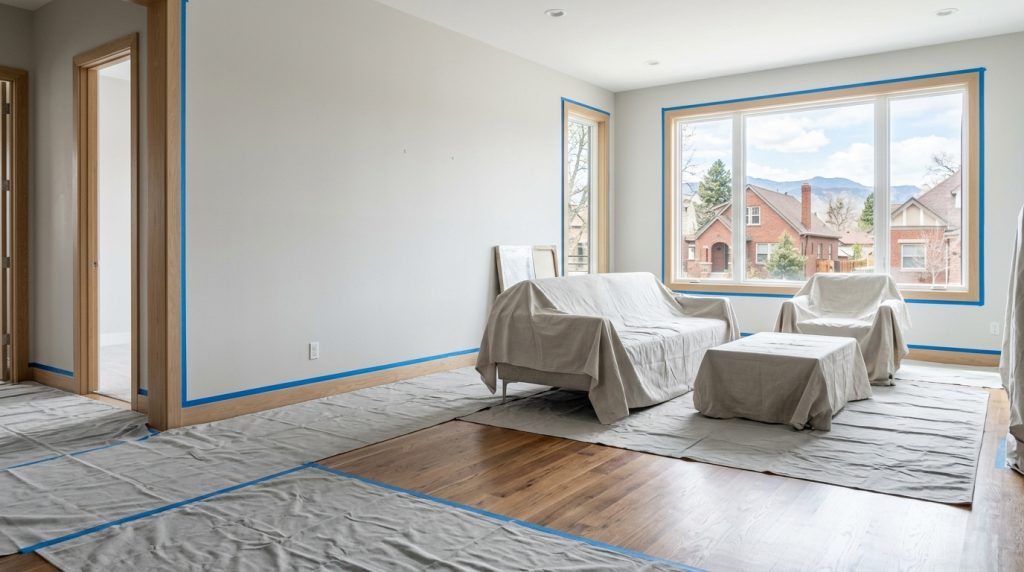
One of the most important preparation steps is deciding what to do with your furniture. Ideally, smaller pieces should be removed from the room completely. Larger furniture that cannot easily be moved can usually be relocated toward the center of the room so the walls remain accessible. Do not assume that every heavy item should be moved by yourself. Large furniture can be difficult to handle safely, and professional painters may have procedures for moving and protecting larger pieces. Once the room is cleared, the painters can cover remaining furniture with protective materials.Protect Floors and Furniture
Protecting floors and furniture is an essential part of preparing a room for professional painting. Even careful painters need to protect the work area because paint, dust, sanding residue, and other materials can reach surfaces during preparation and application. Hard flooring, carpet, furniture, cabinets, and fixtures may require different forms of protection. A professional painting company will typically use appropriate coverings as part of the project preparation, but homeowners should still remove anything particularly valuable, fragile, or difficult to replace. Before work begins, identify floors or furniture that need special attention. This is particularly useful when the room contains expensive rugs, delicate furnishings, or items with sentimental value.Remove Wall Decorations
Removing wall decorations is one of the easiest things homeowners can do before painters arrive. Take down paintings, mirrors, clocks, shelves, photographs, wall-mounted decorations, and similar objects where practical. Store them somewhere away from the painting area. If removing an item leaves a hole, anchor, or damaged section of drywall, do not automatically assume it will disappear under paint. Point it out to the painting contractor so it can be assessed as part of the preparation process. This is especially important if you are changing from a dark color to a light color or repainting a wall with visible imperfections.Clean Walls Before Painting
Clean walls provide a better surface for paint adhesion. Dirt, dust, grease, smoke residue, and other buildup can interfere with a smooth paint application. Not every wall requires the same level of cleaning. A relatively clean bedroom wall may need little more than dust removal, while kitchen walls can have more grease and residue. When cleaning walls before painting, avoid soaking drywall or using aggressive cleaning methods that could damage the existing surface. Use an appropriate cleaning method for the wall material and allow the surface to dry fully. Professional painters can also assess whether additional cleaning is necessary before beginning surface preparation.Identify Wall Repairs Before Painting
A new coat of paint does not automatically fix damaged walls. Small holes, cracks, dents, peeling paint, and other surface problems may need to be repaired before painting. Walk through the room and look closely at the walls under normal lighting. Pay attention to areas around door frames, windows, corners, shelves, electrical fixtures, and previously mounted decorations. Common issues include nail holes, picture-hanger holes, small dents, drywall damage, and cracks.Patch Holes and Cracks
Patching holes and cracks is often part of professional surface preparation, depending on the scope of the painting project. Small nail holes may be relatively straightforward to repair, while larger holes or recurring cracks can require more attention. A crack that keeps returning may indicate an underlying issue that should be evaluated rather than simply covered with filler and paint. If you notice significant drywall damage, water staining, or cracks that appear to be expanding, tell the contractor before painting starts. This allows the condition to be assessed before the surface receives a new finish.Do You Need Drywall Repair Before Painting?
Sometimes. Minor imperfections can often be addressed during normal painting preparation, but more substantial drywall damage may require dedicated repair work. For example, a small nail hole is very different from a large damaged section of drywall. Similarly, a superficial hairline crack is different from a crack that repeatedly reappears. The important thing is to identify the condition before painting begins. If you are unsure whether a wall needs drywall repair before painting, ask the painting contractor to inspect it. Painting over a damaged surface without addressing the underlying problem can leave the defect visible after the project is complete.When Is Primer Needed Before Painting?
Primer is not automatically required for every interior painting project. Whether primer before painting is appropriate depends on the existing surface and the type of paint being applied. Primer may be useful when dealing with certain stains, bare drywall, significant color changes, repaired areas, porous surfaces, or other conditions that require additional preparation. For example, a repaired section of drywall can absorb paint differently from the surrounding painted wall. Priming that area can help create a more consistent surface before the finish coats are applied. The painting professional should determine the appropriate preparation and primer based on the actual condition of the walls rather than applying the same process to every room.Prepare Your Home for Painters: What You Should and Shouldn't Do
Homeowners sometimes feel they need to complete every preparation task before the painting company arrives. In reality, your job is primarily to make the area accessible and communicate important information. You should generally focus on:- Removing small personal belongings
- Taking down wall decorations where practical
- Moving smaller furniture out of the room
- Identifying valuable or fragile items
- Clearing pathways to the work area
- Pointing out wall damage or areas requiring special attention
- Discussing access, parking, pets, and other household considerations with the painting company
Preparing Different Rooms for Interior Painting
Not every room requires exactly the same preparation. Bedrooms are often relatively straightforward. Remove decorations and personal items, move furniture, and make sure the walls are accessible. Living rooms may require more furniture movement because of sofas, entertainment units, bookshelves, artwork, and larger decorative pieces. Kitchens can require additional attention because walls may have grease or cooking residue. Cabinets, appliances, countertops, and backsplashes may also need careful protection. Bathrooms can have moisture-related surface issues, so existing peeling paint, stains, or damaged areas should be identified before work begins. If several rooms are being painted, preparing one room at a time can make the process easier to manage. It also gives your household a clear idea of which areas are available while other rooms are being worked on.What Denver Homeowners Should Consider
Denver homes can vary considerably in age, construction, interior finishes, and previous renovation history. A recently renovated home may have relatively smooth surfaces, while an older property can have multiple layers of paint, previous repairs, textured walls, or aging drywall. That is why there is no universal preparation process for every Denver interior painting project. The condition of the existing surface should guide the preparation. A wall with minor wear may only need basic preparation, while an older or heavily damaged surface may require more extensive work before new paint can be applied. It is also useful to discuss ventilation and access with your painting contractor. Depending on the products being used and the room, appropriate ventilation may be part of the project's setup and safety considerations.What Happens When Professional Painters Arrive?
Once your home is prepared, the painting crew can inspect the work areas and confirm the project's scope. Professional painter preparation commonly involves assessing the surfaces, protecting areas that should not receive paint, addressing appropriate repairs, preparing the walls, and getting the room ready for application. The exact process depends on the condition of the surfaces and the agreement with the homeowner. This is why it helps to discuss expectations before the project starts. If you want damaged trim repaired, certain holes filled, doors painted, or specific surfaces primed, make sure those items are included in the project scope. Clear communication at the beginning can prevent misunderstandings later.Interior Paint Preparation Checklist
A simple checklist can help you avoid forgetting small tasks before the painters arrive. Walk through the house several days before the project and check each room. Give yourself enough time to move belongings without rushing on the morning work begins. Your basic interior paint preparation checklist should include:- Remove artwork, photographs, and wall decorations.
- Store small personal items away from the work area.
- Move smaller furniture out of the room.
- Identify large furniture that needs special handling.
- Remove fragile and valuable items.
- Clear pathways to the rooms being painted.
- Identify holes, cracks, stains, peeling paint, and drywall damage.
- Tell the contractor about areas that need special attention.
- Discuss pets and household access arrangements.
- Confirm which surfaces and rooms are included in the project.
- Confirm what preparation work is included in the painting estimate.